Tattoo Flash
Tattoo shops hang flash sheets on the wall: bold, simple designs a customer can point at and say "that one." Today the whole class builds one flash sheet together for a made-up shop: a lightning bolt, a lucky star, and a flame. The starter file has a dashed outline of each design. Squares mark where to click a corner, circles mark where to click a curve. You trace the bolt with the Pen tool, build the star with the Star and Rotate tools, add tapered burst lines, and turn in a midpoint. Then you draw the flame in two halves with the Curvature tool, join them, paint the inner flame with the Blob Brush, and clean it up.
Shortcuts are written Windows / Mac. Example: Ctrl+G / Cmd+G. On a Mac, Option is the key some Windows lists call Alt.
We build together. Follow along step by step. When you finish a step early, wait at the check line or try the bonus at the bottom.
What you turn in
- Midpoint (Step 5):
LastName_BoltStar.jpg: a JPEG of the bolt and the faceted star with its burst lines. - Final (Step 9, or after the bonus):
LastName_TattooFlash.jpg: a JPEG of the finished sheet with all three designs and the dots, plus sparkles if you did the bonus. Keep yourLastName_TattooFlash.aifile for yourself. Do not upload it.
Downloads
TattooFlash_StudentFiles.zip: the two files for today: the starter file and the class swatches. Unzip it before Step 1.TattooFlash_Starter.svg: inside the zip, in the Starter folder. A cream 1600 by 1000 artboard with dashed outlines for all three designs and a row of color chips.MKT202_TattooFlash_Swatches.ase: inside the zip, in the Palette folder. The five class colors. Only needed if your color chips go missing.
What we build today
Each design has its own dashed outline in the starter file: bolt on the left, star in the middle, flame on the right. You hide each outline when its design is done, so none of the dashes show in your JPEGs.
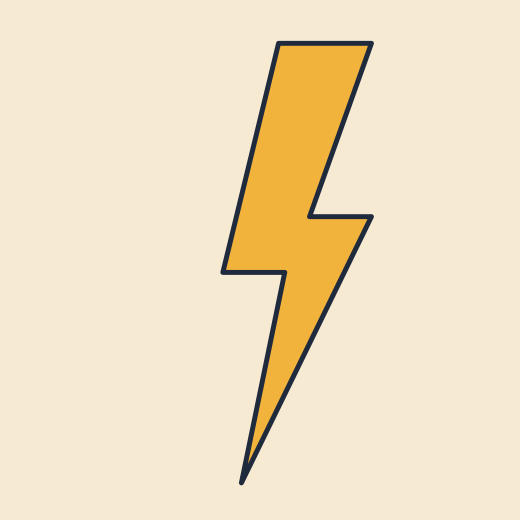
Design 1: Lightning bolt

Design 2: Lucky star
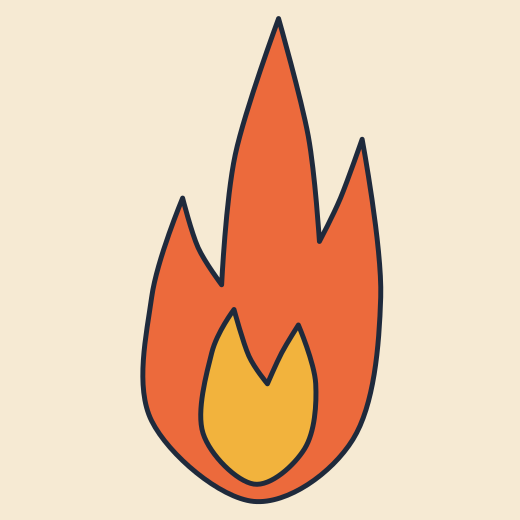
Design 3: Flame
What your files should look like
These images were drawn by a script to show the target look. They are an approximation, not an Illustrator file. Your inner flame and dots will not match exactly, and that is fine.
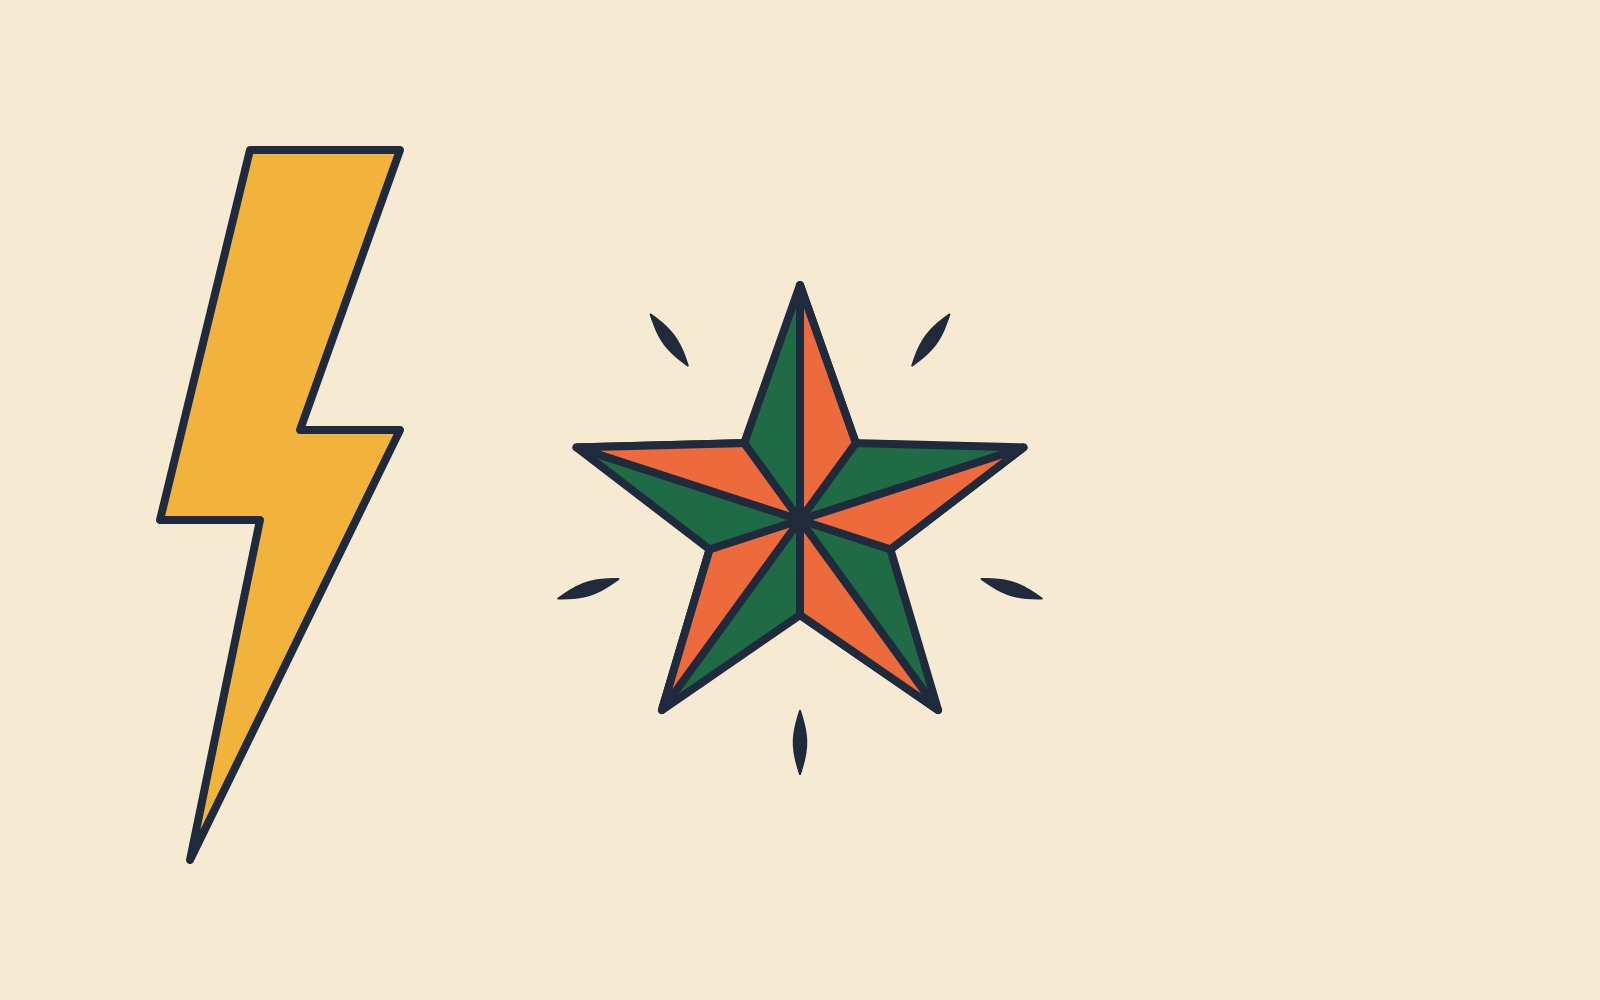
Midpoint example
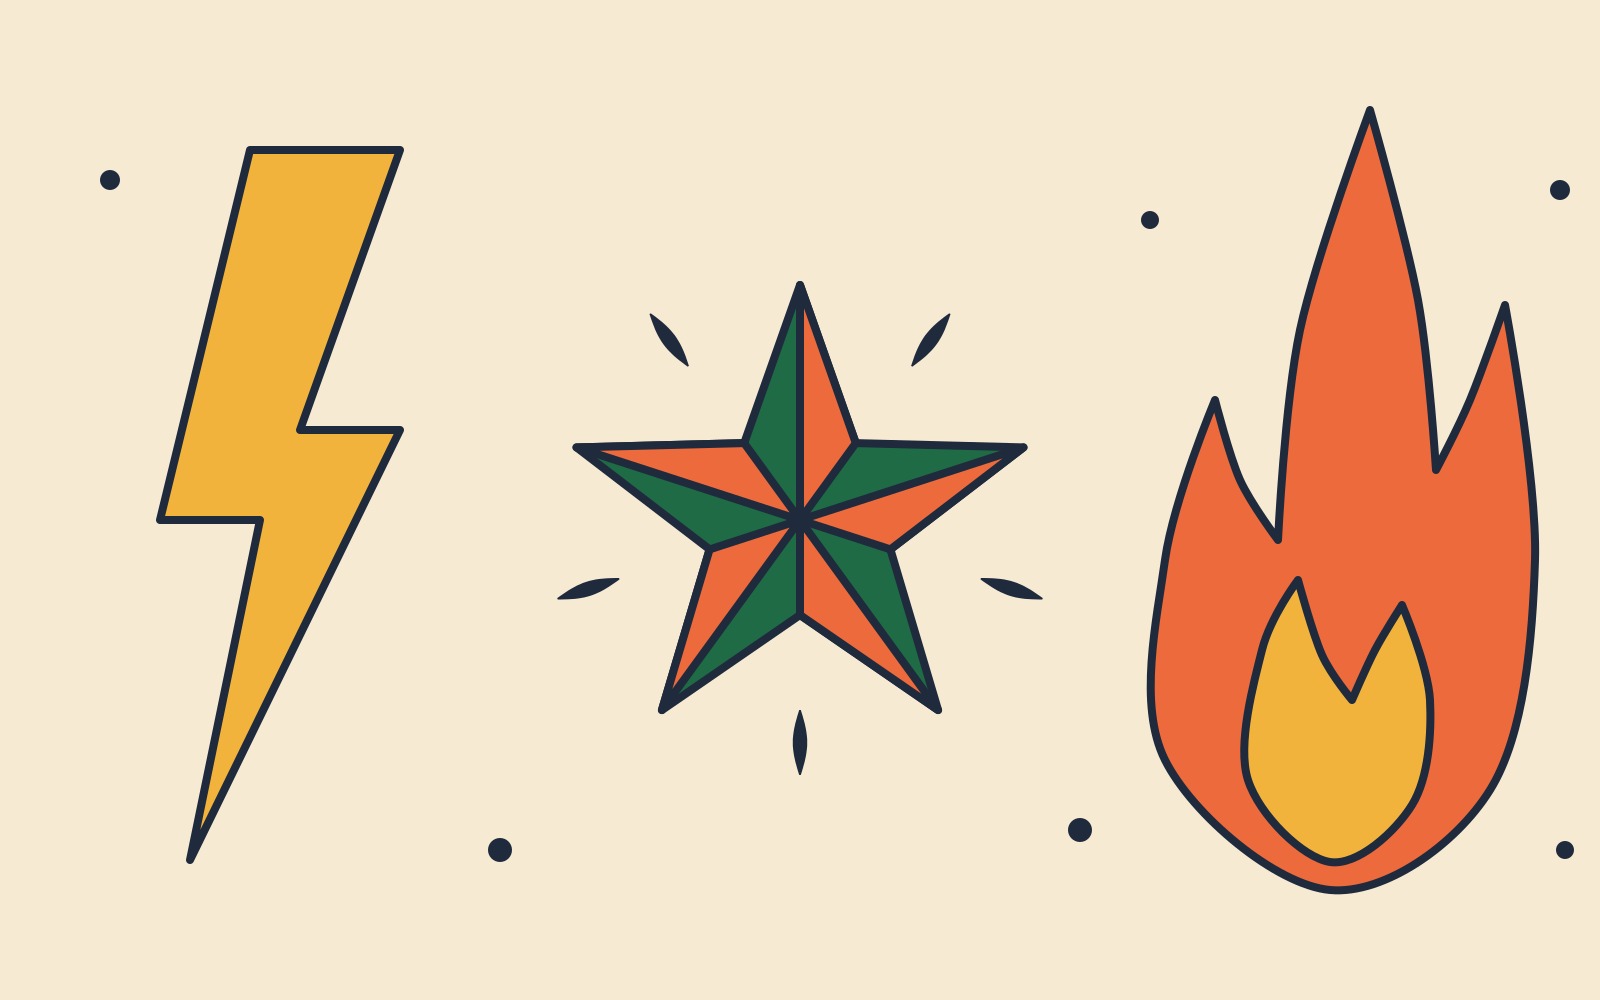
Final example
The class palette
Every color comes from these five. The starter file has a chip of each color. To color a shape, select it, press I for the Eyedropper, and click the chip. Every chip has the Flash Navy 8 pt outline, so shapes get the outline too.
| Swatch | Name | Hex | Used on |
|---|---|---|---|
| Flash Navy | #1F2A3C | Every outline, the burst lines, the Blob Brush dots | |
| Sailor Gold | #F2B33D | Bolt, inner flame, sparkles | |
| Vermilion | #EC6A3C | Star facets, outer flame, sparkles | |
| Clover Green | #1F6B45 | Star, sparkles | |
| Cream Paper | #F6EAD3 | Background (already in the starter), shine marks |
Quick refresher: Photoshop to Illustrator
You may have used the Pen tool in Photoshop. Here is how today's tools map over.
| Photoshop | Illustrator |
|---|---|
| Pen tool draws a path, then you fill or stroke it | Pen tool P draws the shape itself and fills it as you click. |
Direct Selection A moves one anchor | Same key, same white arrow. The black arrow V moves the whole object. |
| Convert Point tool | Anchor Point tool Shift+C. Click an anchor to make it a corner, drag from it to make it smooth. |
| Free Transform, rotate a copy | Rotate tool R. Option or Alt click to choose the center, then Copy. |
| Stroke layer style: one thickness all the way around | Width tool Shift+W and width profiles. Thick in the middle, thin at the ends. |
| Brush tool paints pixels | Blob Brush Shift+B paints filled vector shapes you can still clean up and recolor. |
| Layer eye and lock icons | Same idea in the Layers panel. Hidden art does not export. |
Class plan
| Start | Minutes | What | How |
|---|---|---|---|
| 0:00 | 2 | Opening: corners and curves on purpose | Demo |
| 0:02 | 6 | Step 1: Open the starter and set up | Do along |
| 0:08 | 7 | Step 2: Trace the bolt with the Pen tool | Do along |
| 0:15 | 9 | Step 3: Build the faceted star | Do along |
| 0:24 | 6 | Step 4: Tapered burst lines | Do along |
| 0:30 | 3 | Step 5: Midpoint turn-in | Gate |
| 0:33 | 8 | Step 6: Draw the flame in two halves | Do along |
| 0:41 | 6 | Step 7: Join the halves | Do along |
| 0:47 | 7 | Step 8: Paint and clean the inner flame | Do along |
| 0:54 | 4 | Step 9: Dots and final export | Turn-in |
| 0:58 | Core ends. Midpoint and final turned in. | ||
| 0:58 | 8 | Step 10: Bonus sparkles with the Star tool | Bonus, ahead students only |
| 1:06 | Bonus ends. Optional steps. | ||
Steps
Open the starter and set up
about 6 min- Unzip
TattooFlash_StudentFiles.zip. In Illustrator, choose and openTattooFlash_Starter.svgfrom the Starter folder. - Choose . Set the format to Adobe Illustrator (ai), not SVG. Name the file
LastName_TattooFlash.aiand click Save. Click OK in the options box. - Look at the artboard: dashed outlines of a bolt, a star, and a flame on cream. Squares mark corner clicks. Circles mark curve clicks. Five color chips sit along the bottom edge.
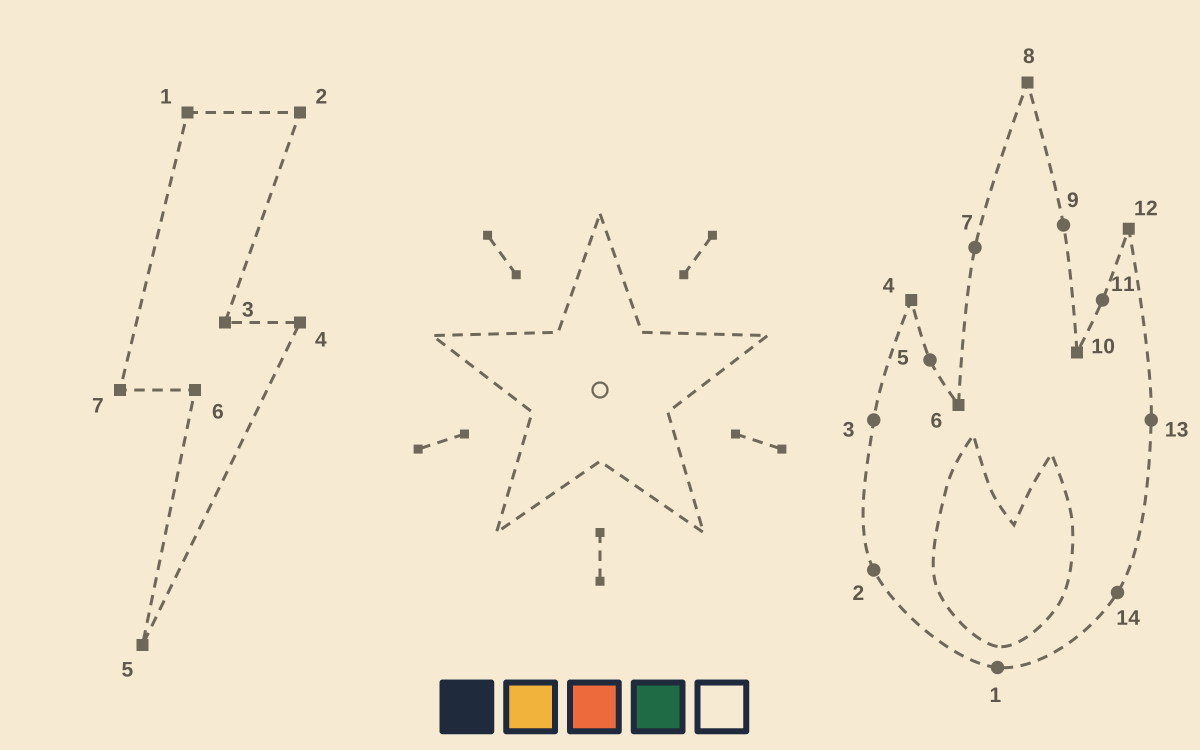
The starter file. Squares are corner clicks, circles are curve clicks, numbers give the order. - Check two settings. Both are usually already on. Open the menu: Smart Guides should have a check mark (press Ctrl+U / Cmd+U if not). Open : the center square of the Reference Point grid, the small grid of nine squares on the left, should be filled (click it if not).
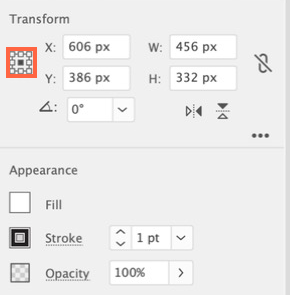
Properties panel. The orange box is the Reference Point grid. The center square should be filled. - Open and click the arrow next to Layer 1. You see five rows:
Chips,Flame guide,Star guide,Bolt guide, andBackground. - Click the empty box just left of each name for
Background,Bolt guide,Star guide, andFlame guide. A padlock appears. Locked art cannot be clicked or moved. Lock these before you touch anything on the artboard. - Click the eye next to
Flame guideto hide the flame outline. You turn it back on in Step 6.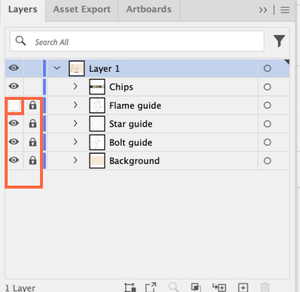
Layers panel after this step: four rows locked, Flame guide hidden. - Move the chips off the artboard. Press
Vand click any chip. All five select together because they are one group. In the Transform section of the Properties panel, type1080in the Y box and press Return. The chips jump below the artboard.
If not: If you clicked the eye instead of the lock, click the eye again to show the art, then click the empty box just right of it. Lock the bottom four rows.
- Chips go below the artboard, not on it.
- The guides stay locked all class. You only hide and show them.
Trace the bolt with the Pen tool
about 7 min- Press
Pfor the Pen tool. Click once on square 1. Click, do not drag. A drag pulls out handles and curves the line. - Click squares 2, 3, 4, 5, 6, and 7 in order.
- Move the cursor back over square 1. A small circle appears next to the Pen cursor. Click to close the shape.
- Press
Vand click the bolt. PressIfor the Eyedropper and click the Sailor Gold chip. The bolt fills gold and gets the Flash Navy8 ptoutline. - Press
Afor Direct Selection. Click one corner of the bolt and drag it a few pixels. Only that anchor moves. Undo with Ctrl+Z / Cmd+Z if you liked it better before. - If any corner came out curved, press
Shift+Cfor the Anchor Point tool and click that anchor once. It snaps back to a sharp corner. - In the Layers panel, click the eye next to
Bolt guide. The bolt outline hides. - At the top of the Layers panel, double-click the name
<Path>for your bolt and typeBolt.
If not: If the Pen keeps drawing after square 7, press Return (Enter on Windows), click the open end with the Pen, and click square 1. If the fill looks odd, the path is not closed.
- Seven clicks, seven corners. If you have more anchors, a click missed. Undo and click again.
Build the faceted star
about 9 min- Click and hold the Rectangle tool in the Toolbar and choose the Star tool. Click once inside the dashed star. In the Star box, type Radius 1
235 px, Radius 295 px, and Points5. Click OK.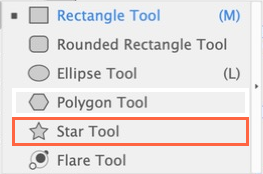
The Rectangle tool group. Click and hold the Rectangle tool, then choose Star Tool. - Press
Iand click the Clover Green chip. Then click the Fill square in the Toolbar and click None. The star stays an outline for now so you can see the center ring through it. - In the Transform section of the Properties panel, type
800in the X box and498in the Y box. The star lands on its dashed outline. - Click empty gray space, or press Ctrl+Shift+A / Cmd+Shift+A, so nothing is selected. If the star stays selected, the Pen tool deletes its anchors instead of snapping to them.
- Press
P. Click the small ring at the center of the star, click the top tip, click the inner corner just right of the top tip, then click the center ring again to close. You made one thin triangle. - Press
V, click the triangle, pressI, and click the Vermilion chip. - Keep the triangle selected. Press
Rfor the Rotate tool. Hold Option (Mac) or Alt (Windows) and click the triangle's corner at the center ring. In the Rotate box, type Angle72and click Copy. A second facet appears on the next point.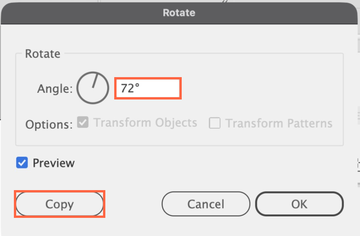
Rotate box. Type 72 in Angle, then click Copy, not OK. - Press Ctrl+D / Cmd+D three times, one press at a time. Each press repeats the rotate and copy. Count five red halves, one on every point. If one is missing, press Ctrl+D / Cmd+D once more.
- Press
Vand click the star's outline. PressIand click the Clover Green chip. The star fills green behind the red facets, because it was drawn first. - Drag a selection box around the whole star, then group with Ctrl+G / Cmd+G. Name the group
Starin the Layers panel.
If not: If the copies landed in the wrong place, Undo back to one triangle, press
R, and Option or Alt click the triangle's corner at the center. If the Pen shows a minus sign over a corner, press Return (Enter on Windows), deselect, and try again.- Option or Alt click sets the center of the rotation. A plain click rotates around the triangle's own middle.
- Shapes stack in the order you draw them. The star was drawn first, so filling it last still puts it behind the facets.
- Ctrl+D / Cmd+D repeats the last transform. You used it in Pin Club.
Tapered burst lines
about 6 min- Click empty gray space, or press Ctrl+Shift+A / Cmd+Shift+A, so nothing is selected. Press
P. Click the inner square of one dashed burst line, click its outer square, and press Return (Enter on Windows). The Pen stops, and you have one open line. Esc does not end a Pen path. - Press
Vand click the line. PressIand click the Flash Navy chip. The Eyedropper also fills it, so click the Fill square in the Toolbar and click the None button. In the Properties panel, set the stroke weight to16 pt.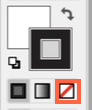
Toolbar Fill and Stroke squares. The orange box is the None button. 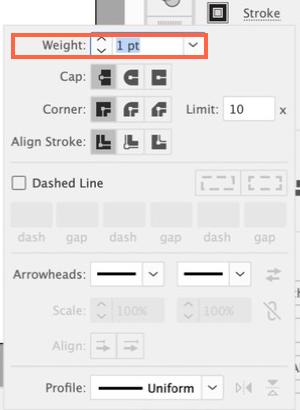
Stroke popup. Weight is the orange box. Type 16. - Click empty gray space, or press Ctrl+Shift+A / Cmd+Shift+A, so nothing is selected. Draw the other four burst lines the same way:
P, click, click, Return. They keep the same style. - Press
Shift+Wfor the Width tool. Hover near one end of the first line and drag inward until the tip is thin. Do the same at the other end. The middle stays full width. - Press
V. Click one of the other lines and Shift-click the other three. Open . If you only see Weight, open the panel menu (four lines, top right of the panel) and choose Show Options. Click the Profile menu at the bottom and choose Width Profile 1, the shape that is thick in the middle and thin at both ends.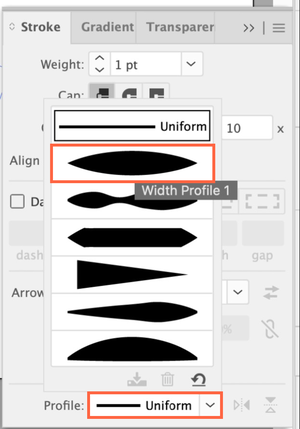
Stroke panel. Open the Profile menu at the bottom and choose the lens shape, Width Profile 1. - Shift-click the first line too so all five are selected. Group them and name the group
Bursts. In the Layers panel, click the eye next toStar guide.
If not: If a line has a fill, select it and set Fill to None. If the Width tool does nothing, make sure you are dragging right on the line. If there is no Profile menu, choose Show Options from the Stroke panel menu.
- Two clicks and Return make an open line. If you skip Return, the next click connects to the last line.
- The Width tool shapes one line by hand. The Profile menu copies a shape to many lines at once.
Midpoint turn-in
about 3 minturn-in- In the Layers panel, check that the eyes for
Bolt guide,Star guide, andFlame guideare all off. - Save with Ctrl+S / Cmd+S.
- Choose . Name the file
LastName_BoltStar.jpg. Set the format to JPEG and check Use Artboards. Click Export. - In the JPEG Options box, set Quality near the high end, Color Model to RGB, and Resolution to Screen (72 ppi). The slider scale differs between dialogs, so go by what your slider shows. Click OK.
- Upload
LastName_BoltStar.jpgto Canvas as your midpoint.
If not: If dashes show, hide that guide's eye and export again with the same name. If chips show, drag them below the artboard.
- You keep building in the same .ai file. The JPEG is only a snapshot, and the JPEG is the only thing you upload.
Draw the flame in two halves
about 8 min- In the Layers panel, click the eye next to
Flame guide. The flame outline comes back with numbers 1 to 14. - Click empty gray space, or press Ctrl+Shift+A / Cmd+Shift+A, so nothing is selected. Click the Curvature tool, the button right beside the Pen tool in the Toolbar (a pen with a curved line), or press
Shift+~.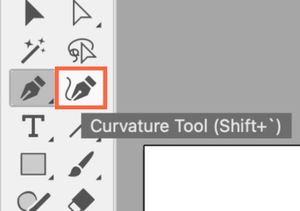
The Curvature tool is the button beside the Pen tool. - Left half. Click circle 1 at the bottom. Click circles 2 and 3. Double-click square 4. Click circle 5. Double-click square 6. Click circle 7. Click square 8 at the top tip. Press Esc. A click makes a curve, a double-click makes a corner.
- Your line may look like a burst line or a thin black line. That is fine. You style the flame in Step 7.
- Click empty gray space, or press Ctrl+Shift+A / Cmd+Shift+A, so nothing is selected. Right half. Press
Shift+~. Click just to the right of square 8, not on it. Click circle 9. Double-click square 10. Click circle 11. Double-click square 12. Click circles 13 and 14. Click just to the right of circle 1, not on it. Press Esc. - Press
A. Click circle 2's anchor on the left half. Drag the round end of one of its handles until the curve sits on the dashes.
If not: If a tip came out round, press
Shift+~ and double-click that anchor to switch it to a corner. If the tool keeps drawing, press Esc.- Start and end the right half next to the left half's ends, not on them. You join them in Step 7.
- With the Curvature tool, Esc ends the path. The Pen tool is different: it needs Return.
Join the halves
about 6 min- Zoom in on the top tip with Ctrl++ / Cmd++. Press
A. Drag a small selection box around the tip so it catches both endpoints and nothing else.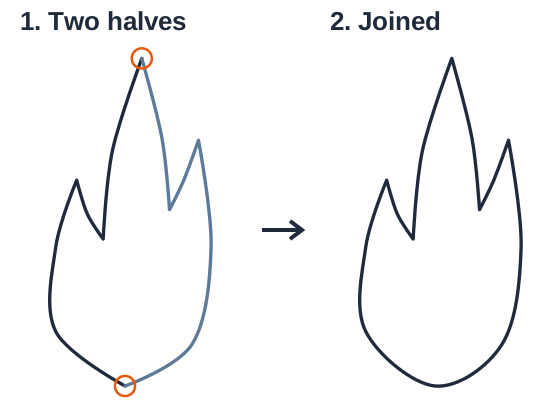
Left: the two halves, with the two spots to select. Right: after Average and Join, one closed navy outline. - Choose . Click Both and click OK. The two endpoints move to the same spot. Then choose or press Ctrl+J / Cmd+J. If the selection disappeared after Average, drag the small box around the same spot again first.
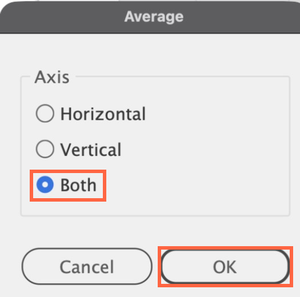
Average box. Choose Both, then click OK. - Zoom to the bottom of the flame. Drag a small box around both bottom endpoints. Average Both, then Join again.
- Press
Vand click the flame. It selects as one closed shape. PressIand click the Flash Navy chip, then click the Fill square in the Toolbar and click None. The flame is a navy outline for now so you can still see the inner dashes. - The bottom point is now a sharp corner. Press
Shift+Cfor the Anchor Point tool. Drag a short way to the left from the bottom anchor. Handles appear and the bottom rounds off. If it twists into a small loop, Undo and drag to the right instead. - Name the path
Outer flamein the Layers panel. Save with Ctrl+S / Cmd+S.
If not: If Join drew a straight line across the flame, Undo and select only the pair at one spot. If clicking the flame selects only half, one of the two joins did not happen. Check the top and bottom again.
- Average moves points. Join connects them. You need both, twice.
Paint and clean the inner flame
about 7 min- Click empty gray space, or press Ctrl+Shift+A / Cmd+Shift+A, so nothing is selected. Double-click the Fill square in the Toolbar, type
F2B33D, and click OK. Double-click the Stroke square, typeF2B33D, and click OK. - Press
Shift+Bfor the Blob Brush. Press the]key 10 or more times, until the brush circle is about a third as wide as the small flame. Paint inside the small dashed flame until it is filled. Overlapping strokes merge into one shape. Stay inside the dashes. - Press
Vand click the gold shape. Its edge is lumpy, with many anchors. - Click and hold the Shaper tool in the Toolbar and choose the Smooth tool, or press
Shift+A. Drag along the lumpiest edge, close to the line. Repeat once or twice. If it gets worse, Undo.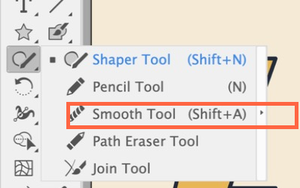
The Smooth tool is in the Shaper tool group. - Press
Vand click the shape again. Choose . A slider bar appears under the shape and simplifies it right away. Drag the slider to the left for fewer points, or to the right if the flame lost its shape. Click empty space to finish. There is no OK button.
The Simplify slider bar. Left is fewer points, right is more. - Press
Iand click the Sailor Gold chip. The shape gets the navy outline. Name itInner flame. - Press
Vand click the outer flame's outline. PressIand click the Vermilion chip. The outer flame fills red behind the gold, because it was drawn first. - Shift-click the inner flame, group them, and name the group
Flame.
If not: If the gold shape covers the red flame's edge, select it with
A and drag the stray anchors in, or Undo and paint smaller. If Simplify changed the shape too much, Undo and move the slider less.- Blob Brush paints filled shapes. That is why Smooth and Simplify have something to clean.
- Keep the better version. Undo is allowed.
Dots and final export
about 4 minturn-in- Click empty gray space, or press Ctrl+Shift+A / Cmd+Shift+A, so nothing is selected. Set the Fill and Stroke squares to
1F2A3C. PressShift+Band press[to make the brush smaller. Click to paint four or more dots of different sizes in the open space around the designs. - In the Layers panel, click the eye next to
Flame guide. Check that all three guide eyes are off. - Save with Ctrl+S / Cmd+S. Choose . Name the file
LastName_TattooFlash.jpg, set the format to JPEG, check Use Artboards, and click Export. Use the same JPEG Options as the midpoint. - Open the JPEG and check it. Upload
LastName_TattooFlash.jpgto Canvas.
If not: If something is missing in the JPEG, fix it in Illustrator and export again with the same name.
- If you do the bonus, export and upload again with the same name.
Bonus: sparkles with the Star tool
about 8 minbonusOnly after your final JPEG is uploaded.
- Click empty gray space, or press Ctrl+Shift+A / Cmd+Shift+A, so nothing is selected. Choose the Star tool. Click once in an open space. Type Radius 1
34 px, Radius 210 px, and Points4. Click OK. - Press
Iand click the Sailor Gold chip. Then click the Stroke square and click None. Sparkles have no outline. - Press
V. Hold Option (Mac) or Alt (Windows) and drag the sparkle to copy it. Make four or five copies around the sheet. - Recolor two of them: select one, press
I, click the Vermilion or Clover Green chip, and set Stroke to None again. - Select all the sparkles, group them, and name the group
Sparkles. Save, exportLastName_TattooFlash.jpgagain with the same name, and upload it again.
If not: If a sparkle has a navy outline, set its Stroke to None.
- Same Star tool, four points instead of five.
Final checklist
- My bolt is one closed gold path with seven sharp corners, named Bolt
- My green star has a red facet on every point, made with one Pen triangle and the Rotate tool, grouped as Star
- Five burst lines are tapered with the Width tool and Width Profile 1, grouped as Bursts
LastName_BoltStar.jpgwas uploaded at the midpoint- I drew the flame in two halves with the Curvature tool, double-clicking for corners
- I joined the halves at the top and bottom with Average and Join, and rounded the bottom with the Anchor Point tool
- I painted the inner flame with the Blob Brush and cleaned it with Smooth and Simplify
- At least four Blob Brush dots, and all three guide eyes are off
LastName_TattooFlash.jpguploaded to CanvasLastName_TattooFlash.aisaved for yourself (not uploaded)- If you did the bonus or the optional step, you saved, exported again, and uploaded again
Optional steps
Finished early? Do these in any order.
Shine marks
about 7 min- Click empty gray space, or press Ctrl+Shift+A / Cmd+Shift+A, so nothing is selected. Press
P. On the bolt, click near the top left inside edge, click a little lower, and press Return (Enter on Windows). - Press
V, click the line, pressI, and click the Cream Paper chip. Set Fill to None, stroke weight10 pt, and in choose Profile Width Profile 1. - Make one more shine mark inside the flame on its left side. Group them as
Shine. Save and export the final JPEG again with the same name.
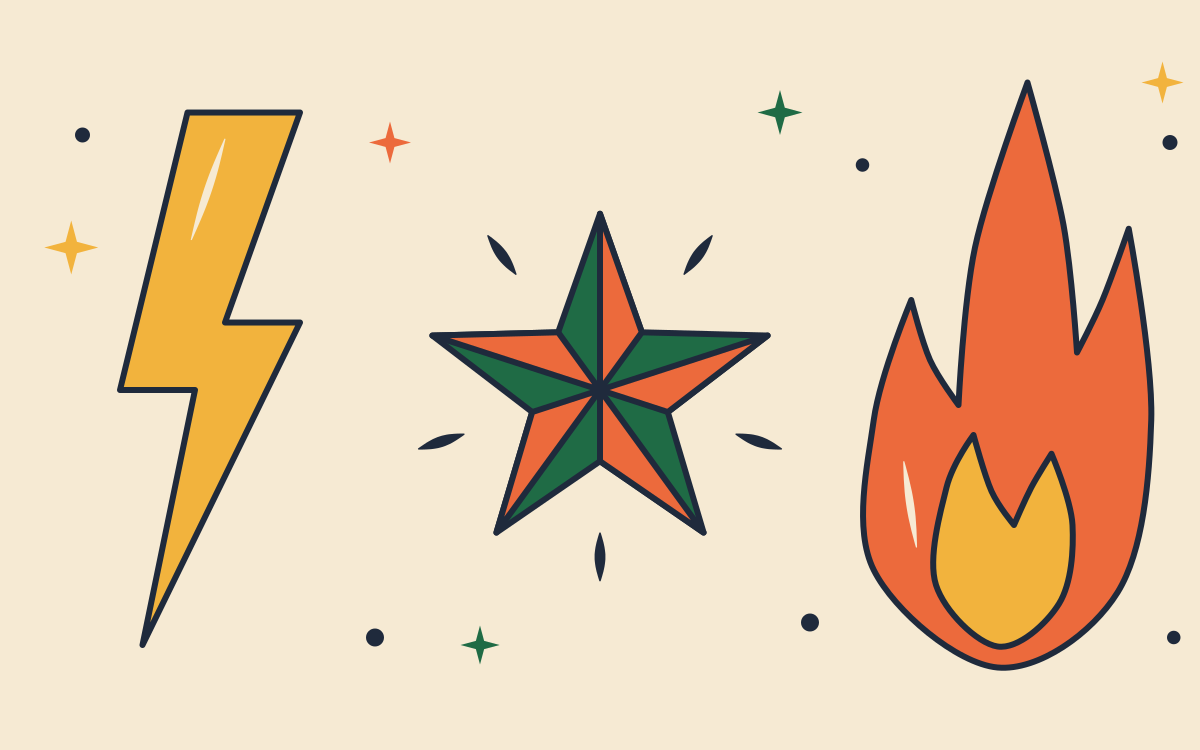
The reference sheet shows the finished look with the bonus sparkles and the optional shine marks. It is an approximation drawn by a script.
Troubleshooting
| Problem | Fix |
|---|---|
| The Pen keeps drawing a line that follows my cursor. | Press Return (Enter on Windows). To close a shape, click its open end with the Pen tool, then click its first point. |
| My bolt has a curved corner. | Press Shift+C and click that anchor. |
| The Pen shows a minus sign over a star corner. | The star is selected. Press Return, click empty space, then pick up the Pen again. |
| My burst lines joined into one zigzag. | Undo until one line is left. Press Return (Enter on Windows) after every two clicks. Esc does not end a Pen path. |
| I cannot see the star's center ring. | The star is filled. Select it, click the Fill square, and click None. Fill it green after the facets. |
| My facet copies are in the wrong place. | Undo back to one triangle. Press R and Option or Alt click the triangle's corner at the center. |
| Dashes show up in my JPEG. | In the Layers panel, click the eye next to that guide to hide it, then export again. |
| The color chips show up in my JPEG. | Select them with V and drag them below the artboard. Export again. |
| My color chips are gone. | Open , click the Swatch Libraries menu at the bottom left, choose Other Library, and pick MKT202_TattooFlash_Swatches.ase from the Palette folder. Or type the hex codes from the palette table. |
| I moved the background or a guide. | Undo. Then lock it with the padlock column in the Layers panel. |
| A flame tip came out round. | Press Shift+~ for the Curvature tool and double-click that anchor. |
| The right half of the flame joined the left half while I was drawing. | Undo. Deselect, then start just beside the left half's end, not on it. |
| Join made a straight line across the flame. | Undo. Zoom in and select only the two endpoints at one spot. Average Both, then Join. |
| I cannot see the inner flame's dashes. | The outer flame is filled. Select it, click the Fill square, and click None. Fill it red at the end of Step 8. |
| The flame will not fill. | One join is missing. Check the top tip and the bottom with A. |
| My Blob Brush paints the wrong color or is invisible. | Set both the Fill and Stroke squares to the hex code from the step, and make the brush bigger with ]. |
| The Width tool does nothing. | Select one burst line, not a group, then press Shift+W. |
| I saved an SVG instead of an .ai. | Choose and set the format to Adobe Illustrator (ai). |
| I cannot find a tool. | Tools hide in groups. Click and hold a tool that has a small triangle in its corner. |
What this project was actually about
In Sessions 1 and 2 you built and combined shapes. Today you placed anchors yourself: corners with the Pen tool, curves and corners with the Curvature tool, and single points moved with the white arrow. You copied a shape around a center with the Rotate tool, shaped strokes with the Width tool, joined two open paths into one shape, and cleaned up a painted shape with Smooth and Simplify. Those are the tools you will use whenever a shape cannot be built from circles and rectangles, including the mascot in Session 7.
Tools used
- Selection tool
V, Direct Selection toolA - Layers panel: lock, hide, and name
- Pen tool
P: corner clicks, closing a path, open lines - Anchor Point tool
Shift+C: click for a corner, drag for a curve - Star tool and the X and Y boxes in the Properties panel
- Rotate tool
Rwith Option or Alt click, Copy, and Ctrl+D / Cmd+D - Width tool
Shift+Wand Width Profile 1 in the Stroke panel - Curvature tool
Shift+~: click for curves, double-click for corners - and
- Blob Brush
Shift+B - Smooth tool and
- Eyedropper tool
Iand a row of color chips - (JPEG, Use Artboards)